Good evening and welcome to our September Blog Hop! We are so glad you are here! If you stopped by Amanda Howard’s page to see her awesome project, you already know that our September theme is Trash to Treasure.
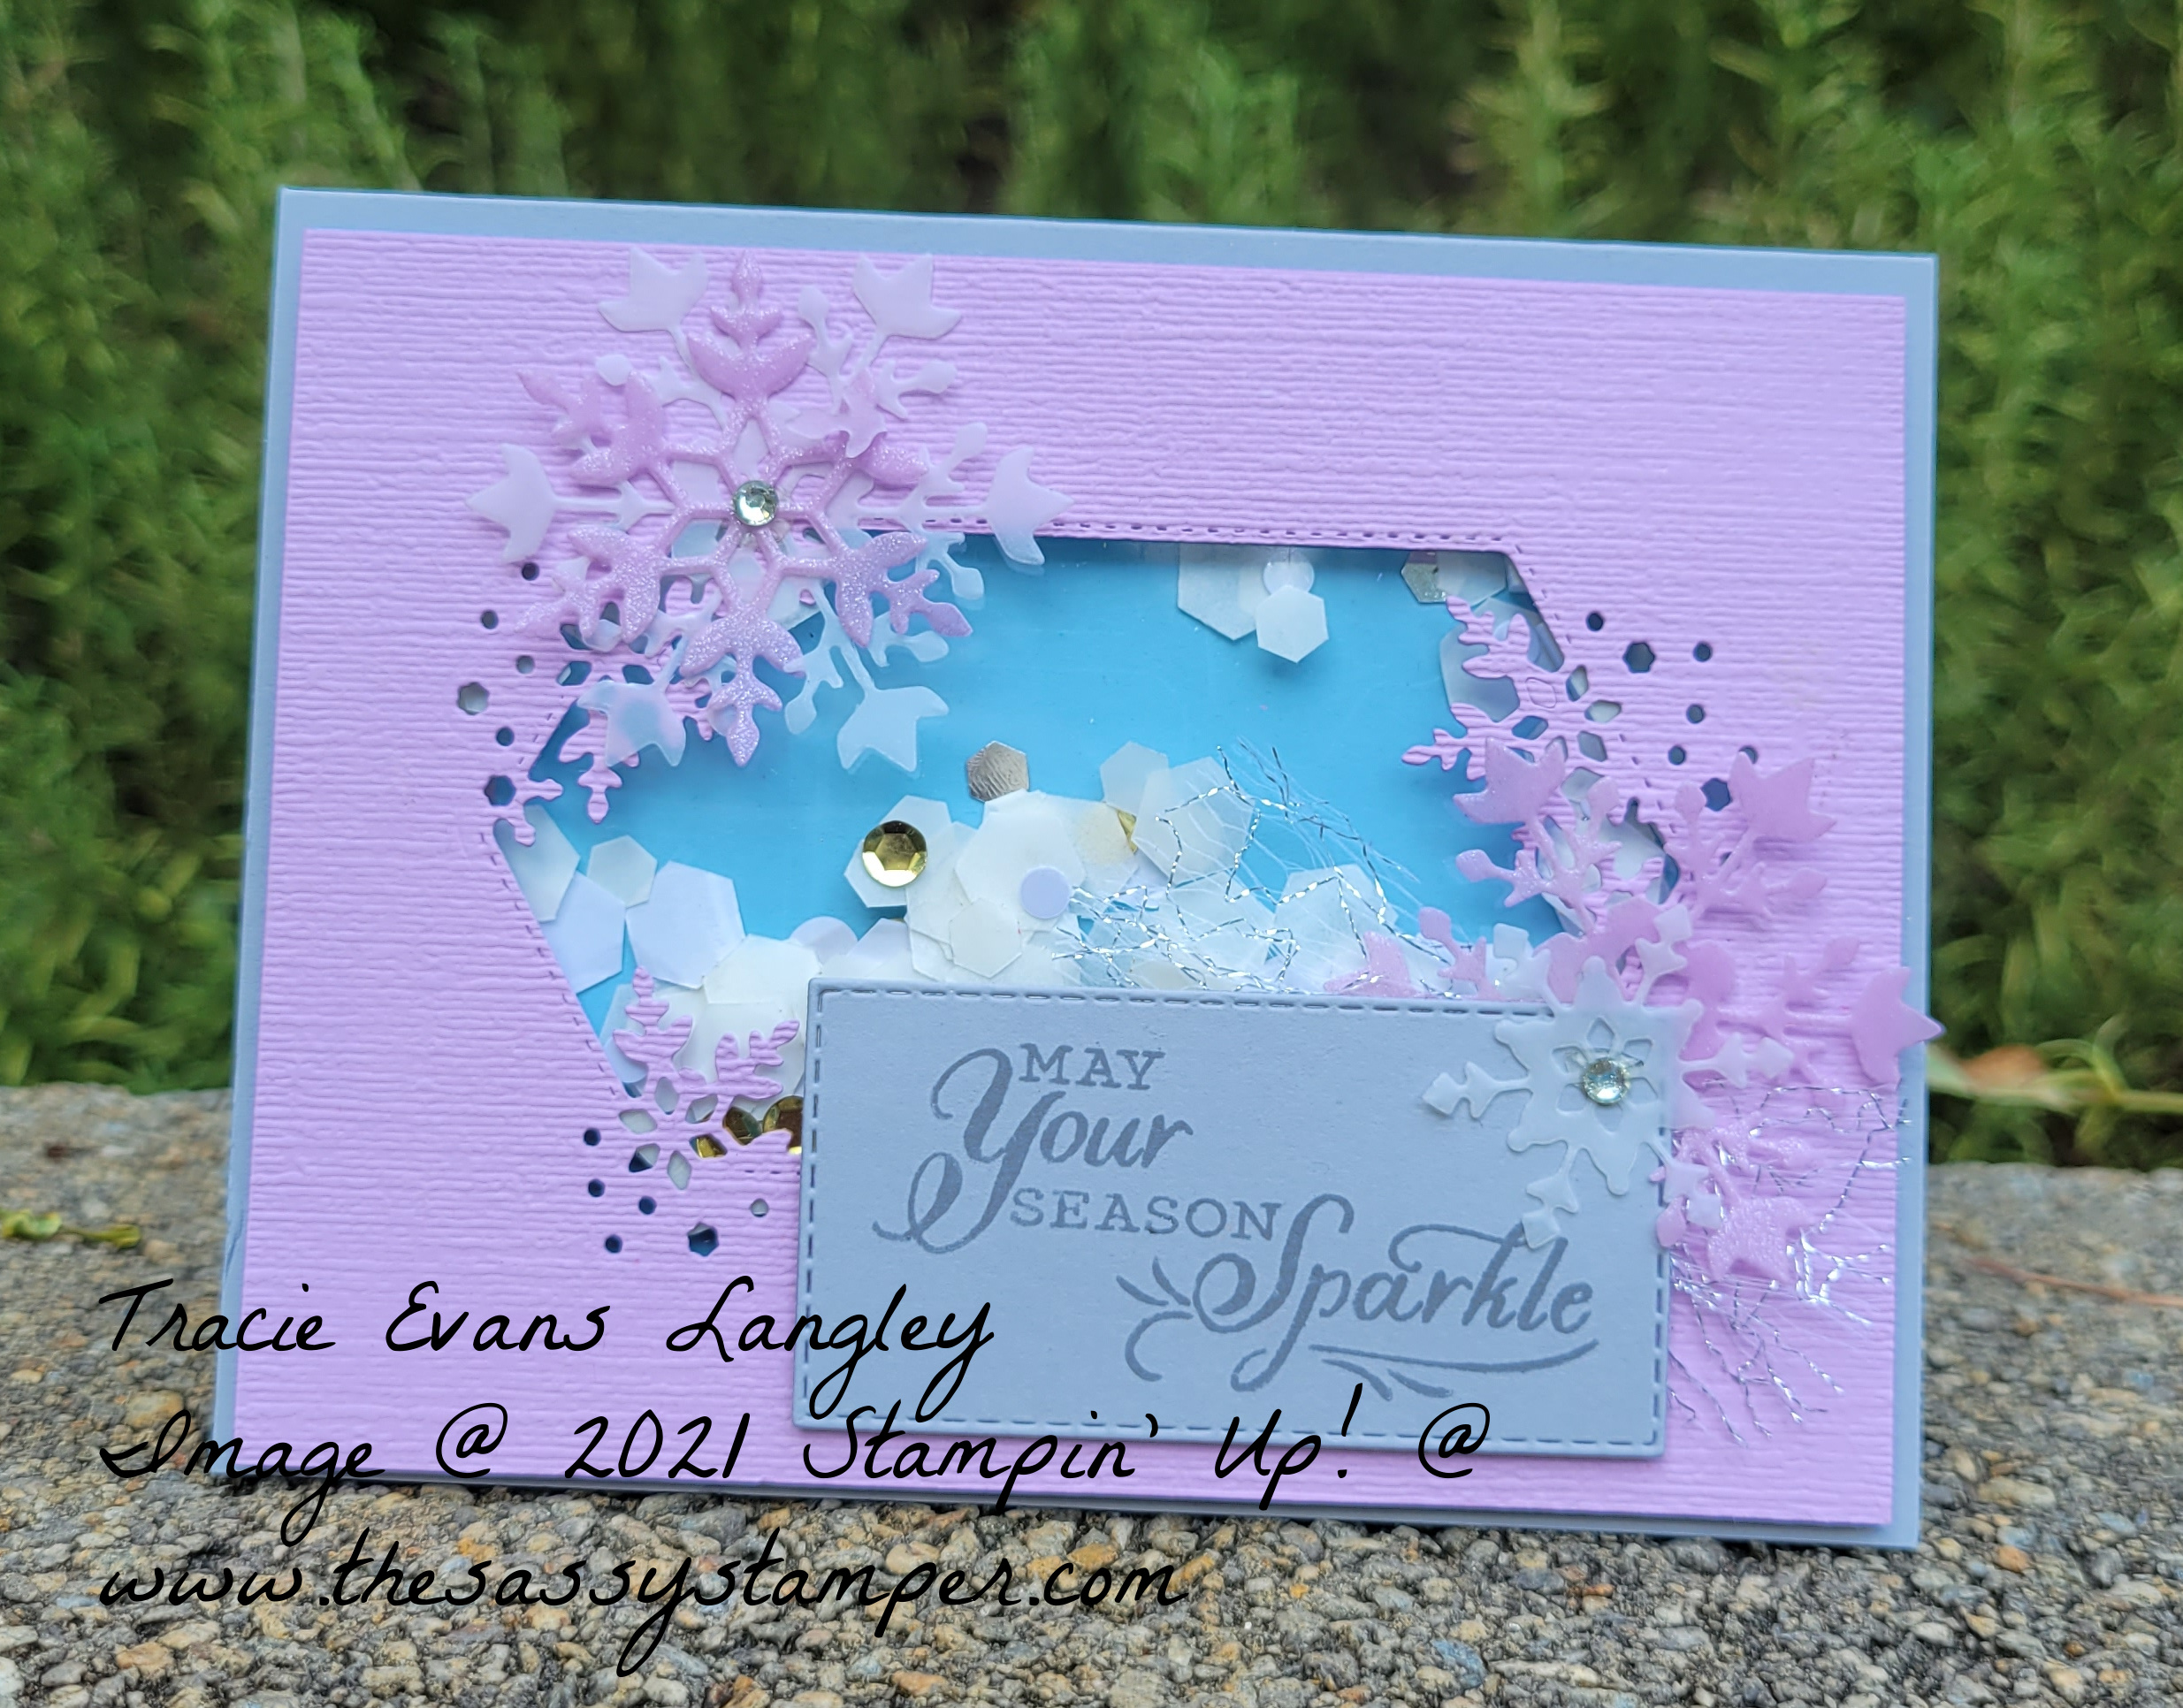 We were supposed to create a project that uses something a normal person, translation non-crafter, would toss out and never think about it! I love this idea SO much! One of the things that I always seem to find all over my studio, house and sometimes in my laundry are the backing pieces off of Stampin’ Dimensionals and Mini Dimensionals, so I had to start saving them and use them for this project! I knew I wanted to make a shaker card, and what better thing to use as snow in a shaker card than these little white pieces! I did have one issue when I started to make my card. I was totally out of Window Sheets, it was late and I was leaving town the next day so couldn’t call one of my delightful downline to borrow some. But I didn’t panic as I had also been saving the acetate pieces that come with with our Photopolymer stamps, so I dug one out of my stash and started stamping!
The dimensions for this card are as follows:
- Smoky Slate cardbase 5 1/2 x 8 1/2 and scored at 4 1/4 and a scrap that is 3 1/2 x 2 for your greeting
- Balmy Blue 4 x 5 1/4
- Fresh Freesia 4 x 5 1/4
- Window Sheet or a piece for your Photopolymer stamps 4 x 5 1/4
- Metallic Mesh Ribbon 3 inches
Now to get busy!
- Cut your cardstock and then die cut your Fresh Freesia piece, the stitched rectangle for your greeting and the snowflakes.
- Stamp your greeting in Basic Gray onto the Smoky Slate stitched rectangle.
- Attach the Window Sheet to the back side of the Fresh Freesia cardstock with Tear & Tape.
- Attach the Foam Strips onto the Window Sheet around the outside edge of the die cut area.
- Now for the fun! Add your Dimensionals backs and Sequins. Gently peel away the protective backing from the Foam Strips and attach the piece of Balm Blue cardstock.
- Adhere the shaker piece to the Smoky Slate cardbase using Multipurpose Glue.
- Use Tear & Tape to attach the Metallic Mesh Ribbon to the Fresh Freesia cardstock.
- Attach your greeting using Dimensionals.
- Attach the vellum snowflakes using Glue Dots and finish up by adding your Rhinestones.
Here is a little video so you can see the shaker in action!
Thank you for letting me share my trash to treasure creation with you! I hope I have inspired to you to look at your craft supplies and what you might normally throw away without a second thought in a different way and make something fantastic!
I am off to see what awesome project Toni Campana has created, so come along with me!
Stay Safe & Crafty!
![]()

September Blog Hoppers
Toni Campana
Tina Lesson
Jo Anne Hewins
Amanda Howard
Tracie Evans Langley
Product List
")


Tracie what an awesome idea never thought of that you rock
Awww. You are too kind! So glad you liked it!
Wow, two treasure to trash items in one card! It looks great!
I meant trash to treasure! Brain is a little tired.
LOL. I know that feeling!
I can’t believe you used the dimensional backings! You certainly have the crafter’s eye. Your card is wonderful!
Tracie, I love the idea of repurposing those pesky dimensional covers! My husband is always commenting about finding them all over the house, they follow you where ever you go. So this is a great idea of re-use! I love the color combos that you used as well 🙂
Awww. Thank you, Toni! My sister-in-law helped with the color combo. She is the one who got me into stamping in the first place, so I always love to stamp with her and get her opinon.
Pretty! This has been an incredibly wonderful post. Many thanks for supplying this info.
Pretty! This was an incredibly wonderful post. Thank you for providing this information.
Pretty! This has been an extremely wonderful post. Many thanks for providing these details.
Hey! Someone in my Facebook group shared this website with us so I came to check it out. I’m definitely enjoying the information. I’m bookmarking and will be tweeting this to my followers! Exceptional blog and outstanding style and design.
Pretty! This was an extremely wonderful post. Many thanks for supplying this info.
Pretty! This has been a really wonderful post. Thank you for providing this information.