
Good evening and welcome to the NC Demos April Blog Hop! We are so glad you joined us! Did you have a chance to stop by and see Laurie Meier’s post? If you did stop by Laurie’s then you know that our theme this month is pleased as punch and we are using punches on our projects.
The cards I am sharing aren’t fancy, but do share how I used the Circle Punches for two of my Cute Cards Quick Kits during my Scrappy Stampers’ Getaway this past weekend at Carolina Beach. These are some of my favorites. I love circle punches and will be so sad to see them retire May 3rd.
This first card originally came from one of our Mystery Card Parties and features Faux Silk, one of my favorite techniques. Here are all the details!
Comfort & Hope Card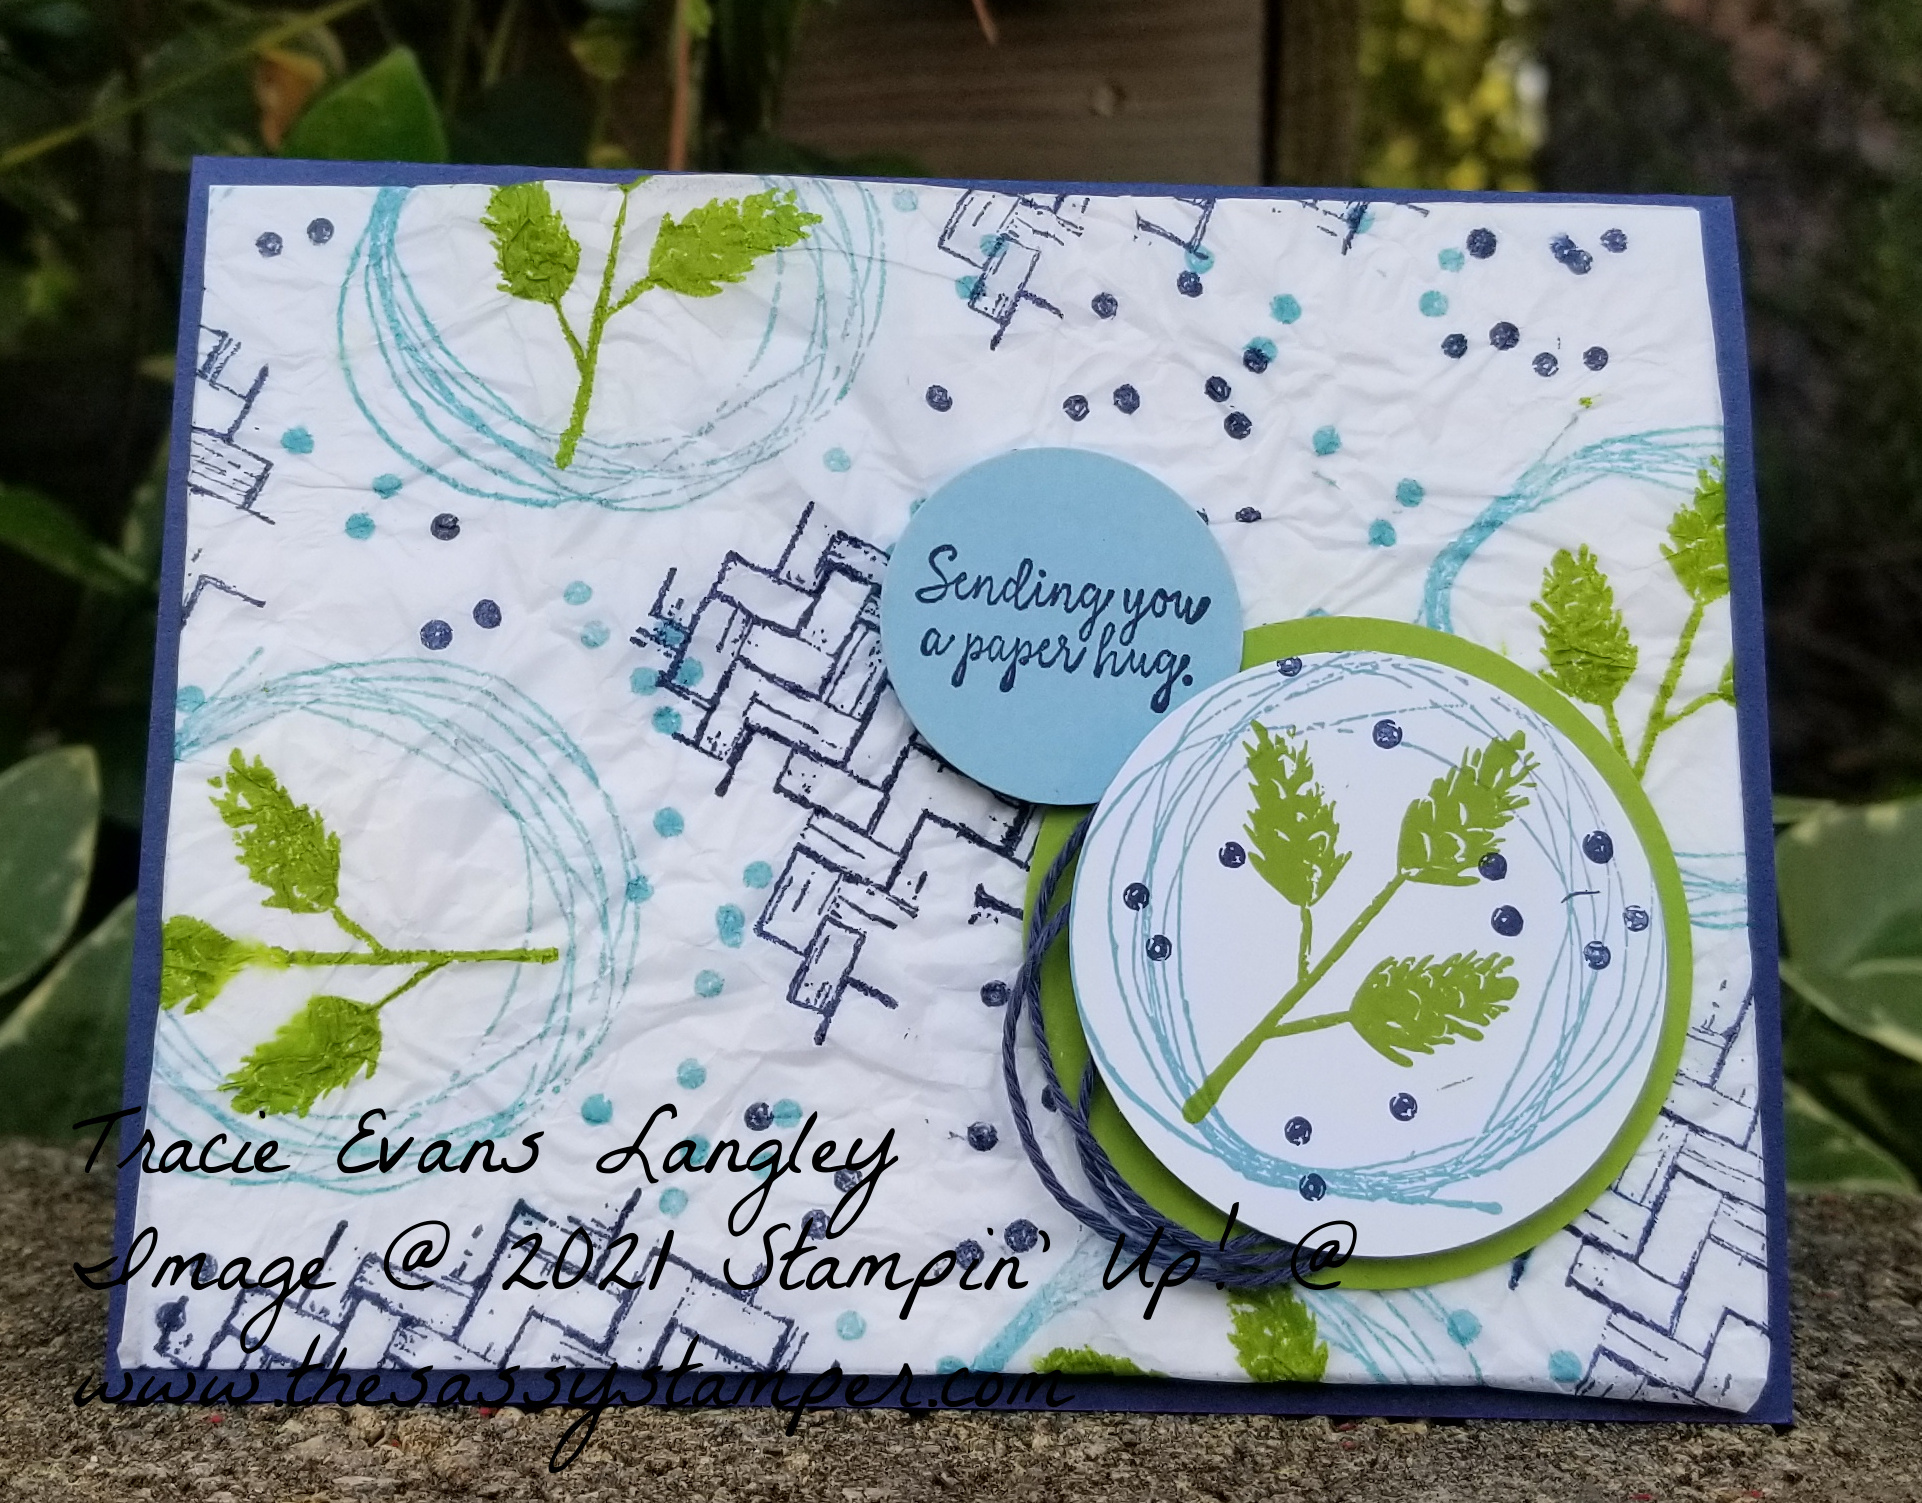
Supplies:
- Comfort & Hope stamp set
- Inks Balmy Blue, Granny Apple Green. Night of Navy Cardstock:
- 1 1/4, 2 & 2 1/4 inch Punches
- Tissue paper. Cut this into a 6×6 inch pieces
Cardstock
- Night of Navy 5 ½ x 8 1/2 and scored at 4 ¼
- 2 Basic White 4 x 5 1/4 & 2 1/4 x 9
- Granny Apple Green 2 1/2 x 2 1/2
- Balmy Blue 2 x 2
- Night of Navy Twine 5 inches
- Stamp the zig zag image in Night of Navy on tissue paper.
- Next stamp the circle image in Balmy Blue on the tissue paper and also onto your scrap of Basic White cardstock. Don’t forget to stamp it onto the 4 x 5 1/4 Basic White piece for the inside of your card.
- Stamp the leaf in Granny Apple Green onto the tissue paper and onto the scrap of Basic White cardstock. Stamp it onto the Basic White piece for the inside of your card.
- Stamp the dots in Balmy Blue and Night of Navy onto the tissue paper. Stamp the dots in Night of Navy onto the scrap of Basic White cardstock and onto the Basic White piece for the inside of your card.
- Stamp your greeting onto the Balmy Blue cardstock in Night of Navy.
- Crinkle/smoosh the tissue paper into a ball. Then unfold it and smooth out and set aside.
- Apply Multipurpose Glue over the entire piece of 4 x 5 1/4 cardstock and then gently put the tissue paper onto the cardstock. Press it down, but do not smooth it out. You want the crinkles. Set aside to dry.
- While your Faux Silk piece is drying, punch out your circle images, your greetings and the Granny Apple Green pieces.
- Attach the Night of Navy twine to the back of the Basic White circle then attach the Basic White Circle to the Granny Apple Green circle with Dimensionals.
- Attach the 4 x 5 1/4 Basic White piece in the inside of the Night of Navy cardbase.
- Once the glue is dry on your Faux Silk piece fold the excess tissue paper around and behind the white cardstock using your favorite adhesive and then attach it to the Night of Navy cardbase.
- Attach your greeting and leaf circle to the Faux Suede piece with your favorite adhesive. I used Multipurpose Glue.
My second card was inspired by one I saw on Pinerest and cased. I love the bright colors and the Circle Celebration stamp set is one I really have enjoyed from the January to June Mini Catalog. Here are all the details for this fun and cheery card:
Circle Celebration Card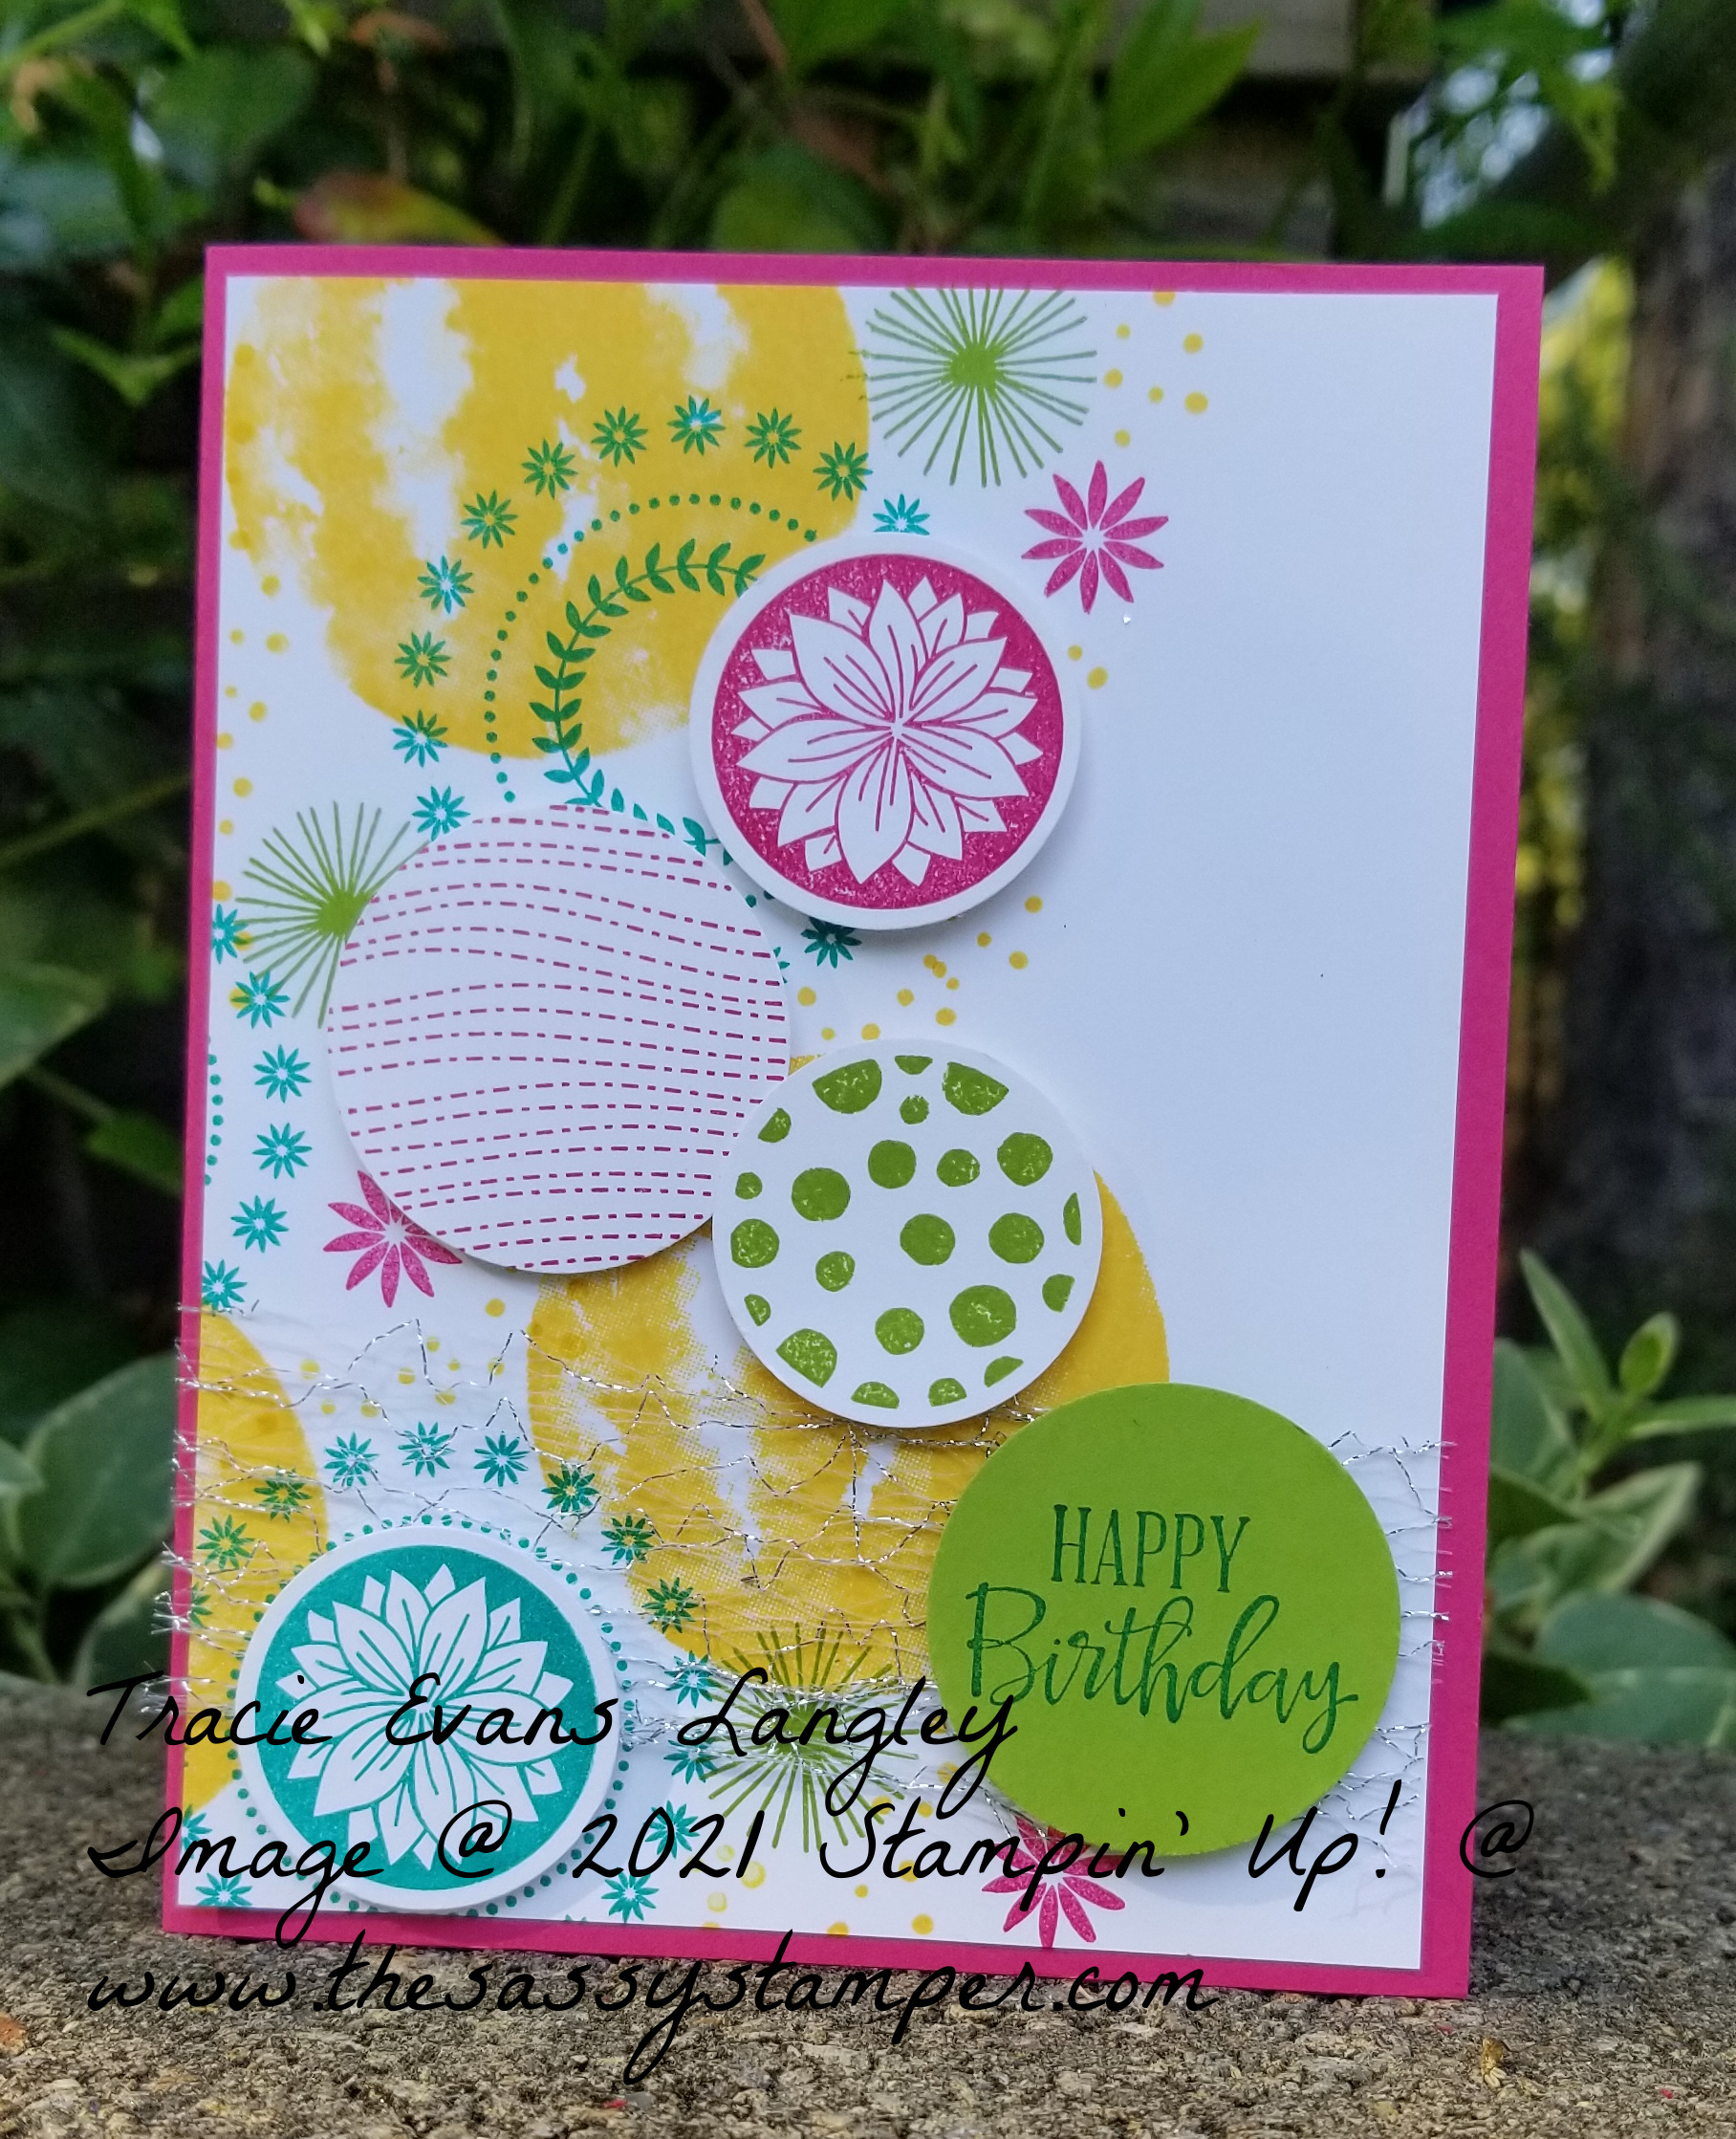
Supplies:
- Circle Celebration & Peaceful Moments stamp sets
- 1 1/4 & 1 1/2 inch Circle Punchs
- Ink pads: Bermuda Bay, Daffodil Delight, Granny Apple Green & Melon Mambo
- Piercing Mat
- Mini & Standard Dimensionals, Multipurpose Glue & Tear & Tape
Cardstock:
- Melon Mambo, 5 ½ x 8 ½ and scored at 4 ¼
- Basic White 4 x 5 1/4 & a scrap for the punched circles
- Granny Apple Green 2 x 2
- Metallic Mesh Ribbon 4 inches
- Stamp the large solid circle in Daffodil Delight.
- Next stamp the circle with the ring of flowers in Bermuda Bay.
- Stamp the small starburst in Granny Apple Green.
- Stamp the smallest flower in Melon Mambo.
- Stamp the little dots in Daffodil Delight.
- Now on the stamp following on your 8 1/2 x 5 1/2 Basic White cardstock: the open flower and the wavey circle in Melon Mambo. Then stamp the open flower in Bermuda Bay. Finally, stamp the polka dot circle in Granny Apple Green.
- Stamp your greeting in Bermuda Bay on the Granny Apple Green cardstock.
- Punch out all 5 circles with the 1 1/2 or 1 1/4 inch the circle punches.
- Attach the 4 x 5 1/4 piece of Basic White to your cardbase. I used Multipurpose Glue.
- Attach the Metallic Mesh Ribbon with Tear & Tape or another strong adhesive.
- Finish your card by attaching your punched circles with a mix of Mini Dimensionals and Dimensionals.
Thank you for letting me share my projects with you this evening. If you have questions or would like to order any of the featured products please contact me. I would love to help you!
Now I am off to see what Amy Austin-Kinler is up to this month! I am sure it is a project full of punch!
Thank you again for join us!
Happy Stamping!
![]()

April Blog Hoppers
Amy Austin-Kinler
Jo Anne Hewins
Sharon Maranich
Laurie Meier
Tracie Evans Langley
I love your cards! My favorite is the pink one with Circle Celebration. Great job!!
Tracie, I do love the simplicity of the circles! I am so happy that I have all of the punches. I will use them retired or not!! Great job.
Thank you, Amy! I will be using my circle punches, too! =-)
I love both cards, Tracie!! The color combinations on both are awesome too
Thank you, Toni!
I haven’t done that technique in a long time lovely card
Thank you, Tina!
Tracie – I love the color combinations and the layers of depth that you have on your cards – just beautiful! Hope you had a great weekend at the beach!
Thank you, Laurie! I loved making all these cards! We had a fantastic time at the beach. I have almost recovered and am starting to think about plans for next year!