Good evening and welcome to the June edition of the NC Demos Bog Hop where if you stopped by Laurie Meier’s fantastic post you know we are celebrating all the things that we love about Summer!
Summer is my favorite time of year. I love to be outside working in the yard planting and taking care of my flowers and herbs. When I am not running around like a crazy person, which is too much of the time, I enjoy long afternoons and evenings visiting with family and friends by the pool with yummy food and cool beverages. The cards I am sharing make me think of these things. Both cards were originally created for my Terrific Techies, but my team, the Stamp Pad Society, liked them so much we made them as part of our monthly team meeting yesterday, too!
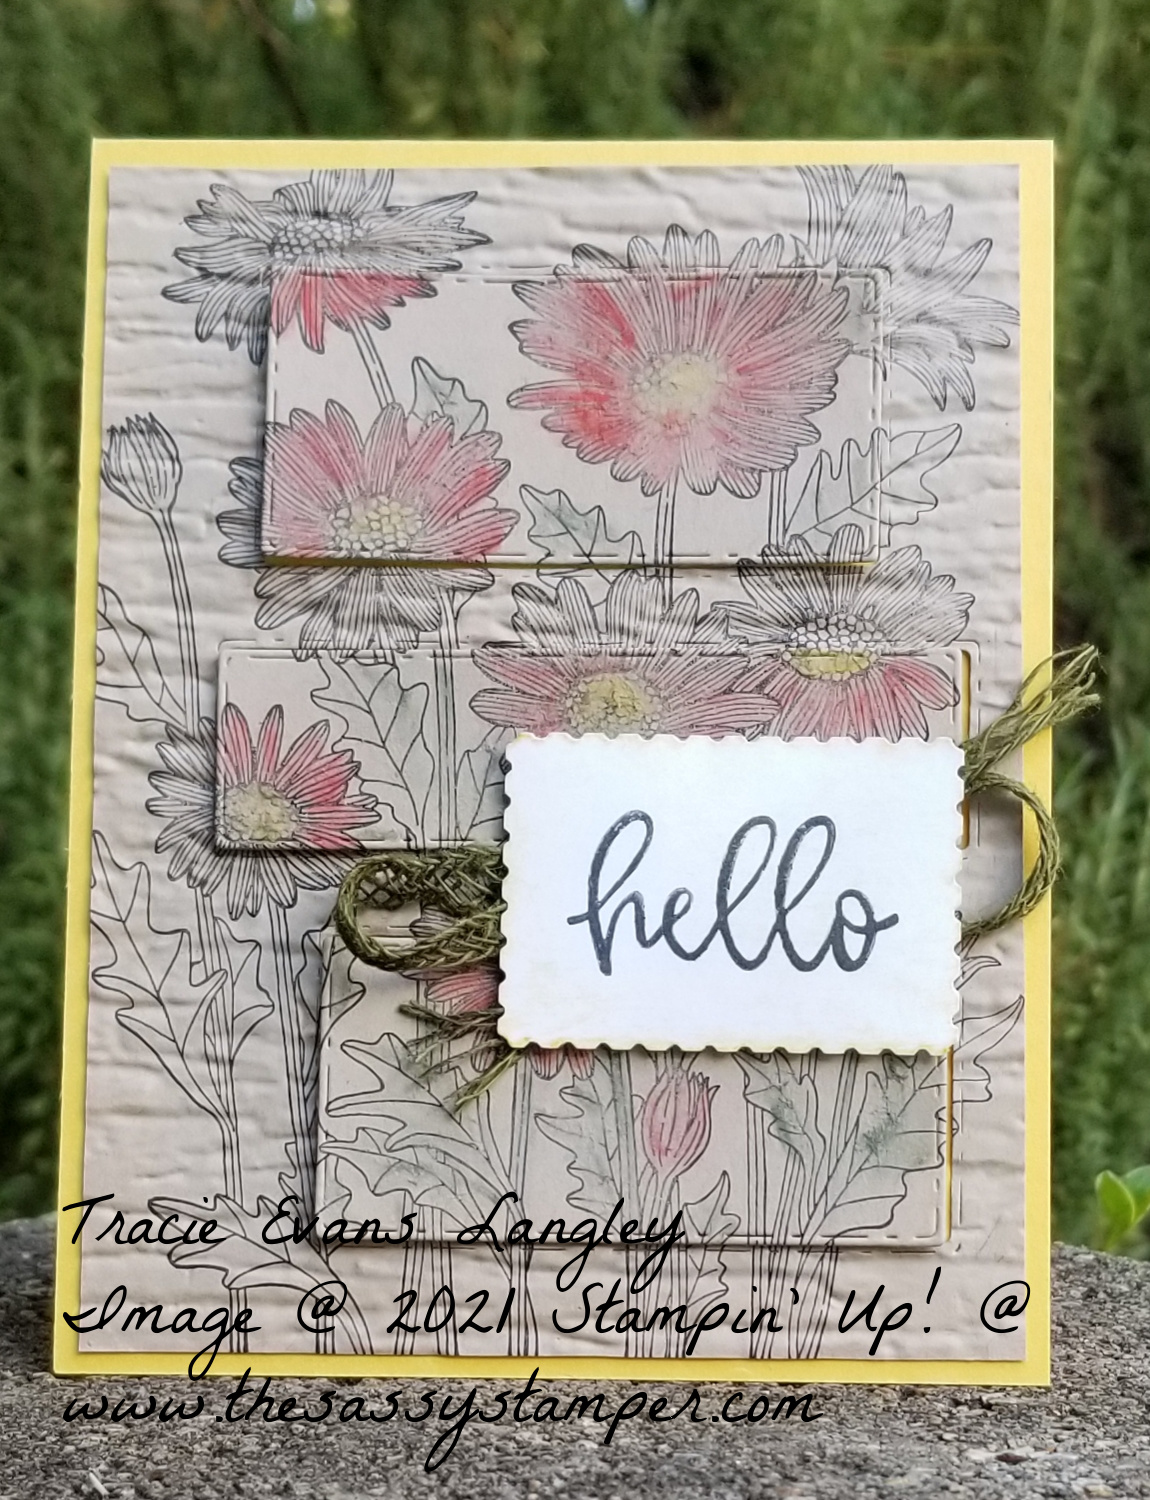
 This first card makes me think of all the pretty flowers blooming around my yard right now. I will admit I did case it a bit from a fellow demo. She used watercolor pencils, but as my June Techies was ALL about the amazing new Soft Pastel Assortment I used them along with a Blender Pen. This really isn’t a hard card to make. It is just a little time consuming because of the coloring. Let me share the measurements for this card then I will give you the scoop on making it. =-)
- Bumble Bee cardbase 4 1/4 x 11 inches and scored at 5 1/2
- Crumb Cake 4 1/4 x 5 1/2
- Mossy Meadow Braided Linen Trim 11 inches. This AWESOME trim is retiring on the 30th of June, so you need to get yours while it is still available!
Now that we have that our of the way here is how I created this card.
First, I used my Stamparatus to stamp the daisies from Daisy Garden in StazOn ink onto the Crumb Cake cardstock. I intentionally cut my cardstock a little bigger than needed so I had a place to put my magnet to hold down my cardstock. So, after I stamped my daisies I trimmed the cardstock down to 4 x 5 1/4.
Next, I was off to my Stampin’ Cut & Emboss Machine and used the rectangles from the Picture This Dies and cut our the three rectangles from my Crumb Cake cardstock. While I was at my counter, I ran the 4 x 5 1/4 piece through my machine using the new Bark 3D Embossing Folder and attached it to my Bumble Bee cardbase using Multipurpose Glue.
My next step was to color in the flowers on my rectangles. I lifted the color from my pastels using a Blender Pen. If you try this at home make sure you do not over work your cardstock while coloring. The cardstock will peel.
After coloring my flowers I added them to my card using Dimensionals.
I finished off my card by stamping, punching and adding my twine and hello tag. I really love using the Biggest Wish stamp set and Rectangle Postage Stamp Punch together!
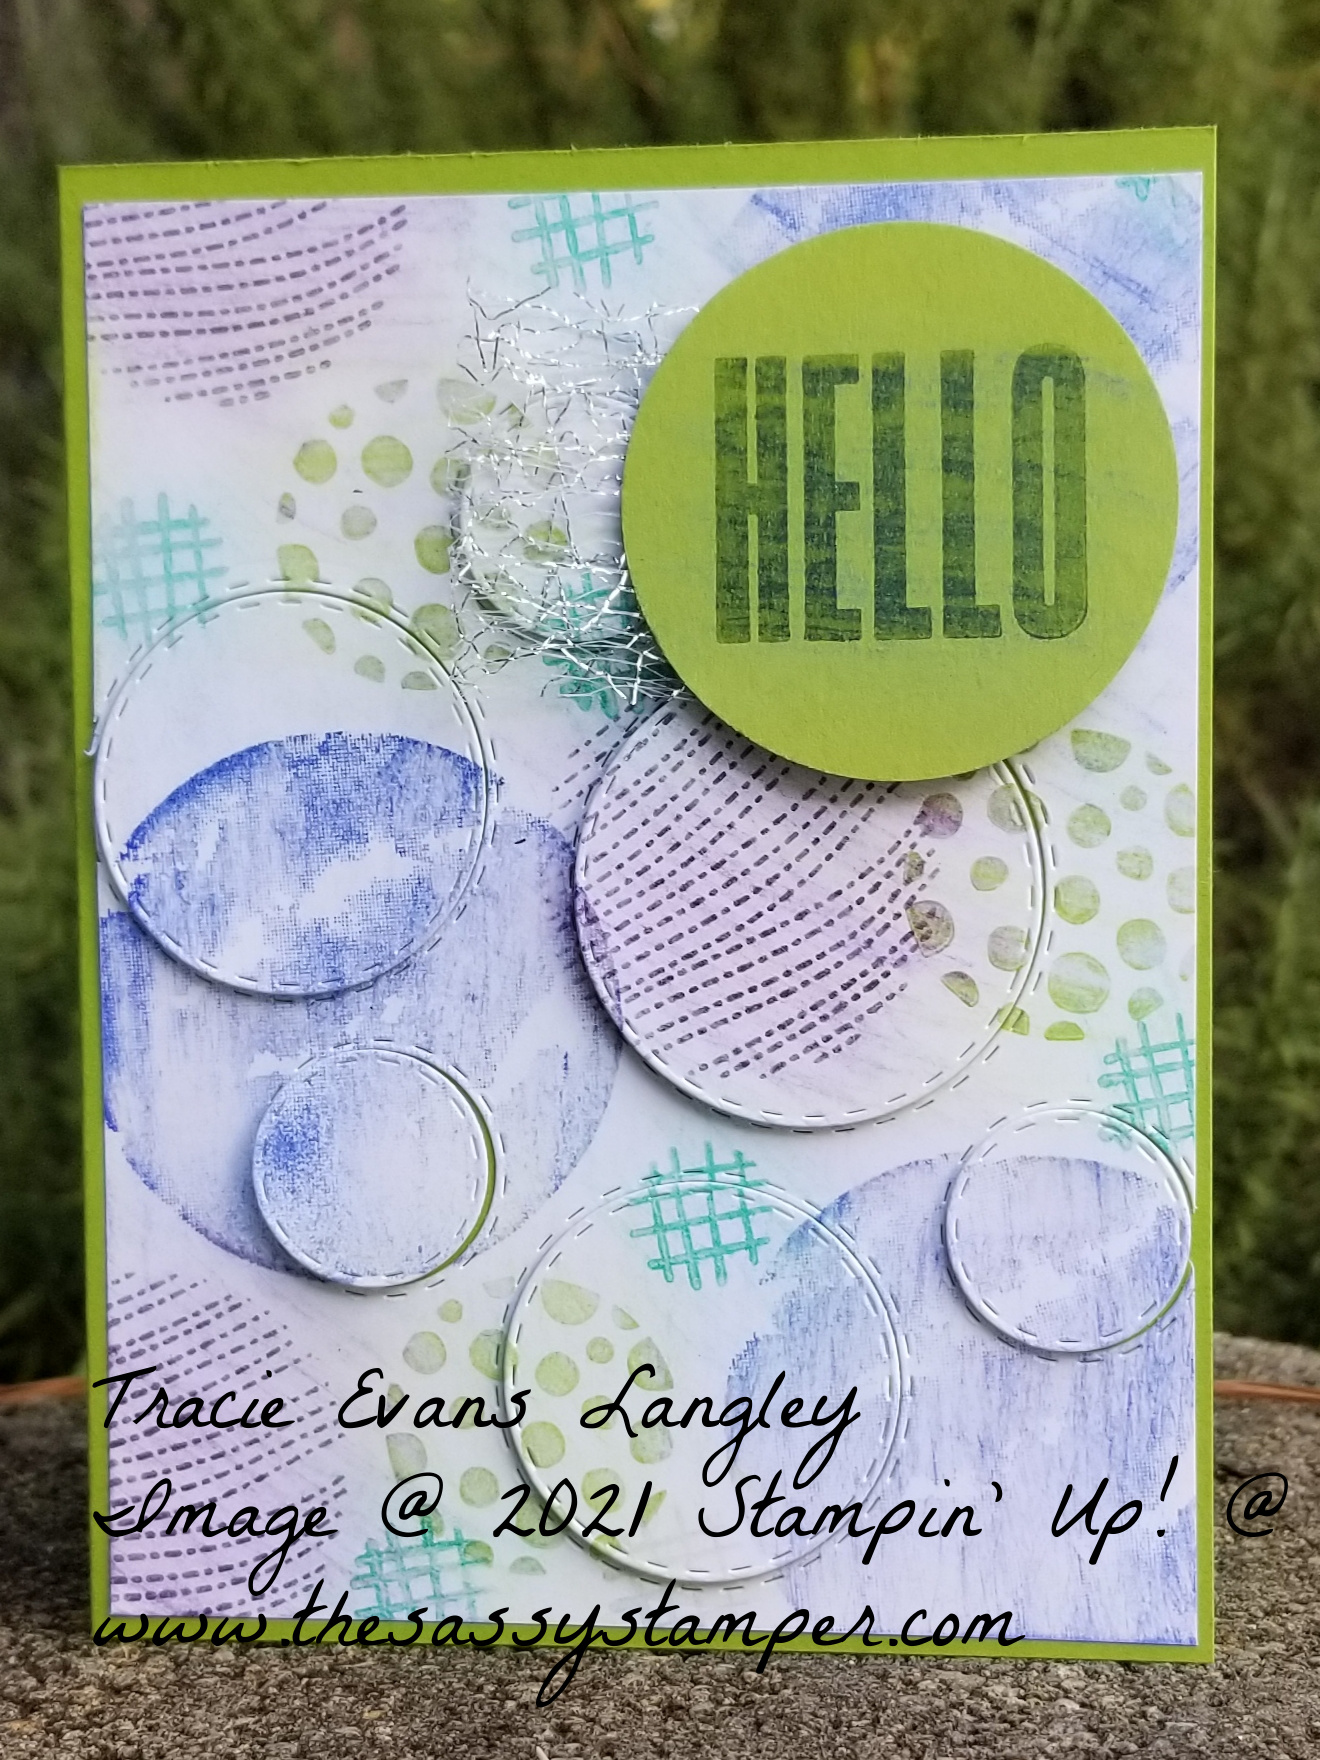
 My second project is SO much fun! It reminds me of being by the pool at night with all the with all the pretty lights and the bubbles bubbles in the spa. I choose to use Circle Celebration as it a favorite of mine from the January to June Mini. It will be retiring on the 30 of this month and I am so sad to see it go.
Here are the measurements for this card:
- Granny Apple Green cardbase 5 1/2 x 8 1/2 and scored at 4 1/4
- Basic White 4 x 5 1/4
- Metallic Mesh Ribbon 4 inches
- A scrap of Granny Apple Green for your HELLO tag
All of the ink for this card is VersaMark. The color all comes from the Pastels! There are a couple of tips I will share with you about using the Pastels with VersaMark. First, make sure your VersaMark pad is VERY inky. Work in small areas. Meaning stamp one to three images at a time then use the pastels to color them. This will let you see which images you are coloring and ensure the VersaMark isn’t dry before you apply the pastels. My final advice is to choose pastel colors that will blend together nicely. You don’t want to make an unfortunate shade of brown or green.
Okay, now that I have shared ALL of that it is time to stamp! First, I stamped the largest of my circles three times and then scribbled on them with the Night of Navy pastel. I didn’t worry about completely cover the circle. I will tell you why in a second.
Next, I stamped each of the remaining circles from the largest to the smallest and scribbled on the Rich Razzleberry, Granny Apple Green and finally the Coastal Cabana pastels
The next stamp is my favorite! Take a cotton ball and gently blend the pastels together. If you think you have too much empty space you can stamp in VersaMark and add more color.
Since I was stamping anyway, I stamped my HELLO in VersaMark and used the Night of Navy pastel to color it.
Now it was back to die cutting. I once again used the Picture This Dies. I then attached my 4 x 5 1/4 inch stamped cardstock to my Granny Apple Green base, then attached my circles using a combination of Dimensionals and Mini Dimesionals.
My final step was to add my HELLO. I think this will be a great card to send to anyone! It is so cheerful!
That is all I have to share this month, but we aren’t done yet! Hop on along with me over to see the awesome project Tina Lesson is sharing this month!
Thank you for stopping in! Please let me know if you have questions about this post, need help with a project or would like order any of the products I have shared. I would love to chat with you!
Happy Stamping!

 June 2021 Blog Hoppers
Tina Lesson
Amy Kinler
Jo Anne Hewins
Toni Campana
Amanda Howard
Laurie Meier
Tracie Evans Langley
Product List
<!——– TAMS End —–


What awesome ideas thanks I will be casing
So glad you liked them! Can’t wait to see what you create!
Both cards are fantastic, Tracie! I love the color schemes for them as well 🙂
I love both of your cards, Tracie. The Garden Daisy is my favorite and I love the techniques that you used. I just might need to copy that! Love the color choice for the second card!
Aww. Thank you, Jo Anne! I can’t wait to see your cards!
I love the “texture” from this technique on both cards!
Thank you SOOOM much, Martinette!
Wonderfully done Tracie! I am completely enamored by your first one the most. I just may have to case it as well. Just picture perfcet.
Awww. Thank you, Amy! I am so glad you like it! Case away! I did! LOL
So pretty! I haven’t tried the pastels yet but now that I have seen them in your projects they seem a little less scary.
Awww. Thank you, Amanda! They really aren’t scary at all! Just be ready for the obsession that comes with them! LOL
Tracie – Your cards are really beautiful. I love the textures and the colors that you added. Thanks for the fun tips on using the soft pastels. I really need to get some and try the techniques! Thanks for sharing.
Thank you, Laurie! I am so glad you liked the cards. I will look forward to seeing what you make with the pastels in the future!
Great cards! I appreciate everyone for participating. One of the days I am going to get up the nerve to do it. Again, thanks. Happy Fourth of July!
Awww. Thanks, Kathryn! We would love for you to join us! We will help you get started. Just let me know. Hope you had a very happy holiday weekend!