 Hello and welcome to your September Blog Hop! Did you already stop by to see what Toni Campana’s post created this month? If not, be sure to hop back over there. I know it’s great!
It’s that time to say goodbye to Summer and welcome Fall! So, in honor of the upcoming season, it’s cool crisp weather and the lovely colors of the Fall foliage this month’s theme is Time to Leaf Summer Behind.
So what does that mean? You guessed it! Our projects should feature the colors of Fall and leaves! We could create ANY kind of project and use any technique or design we liked!

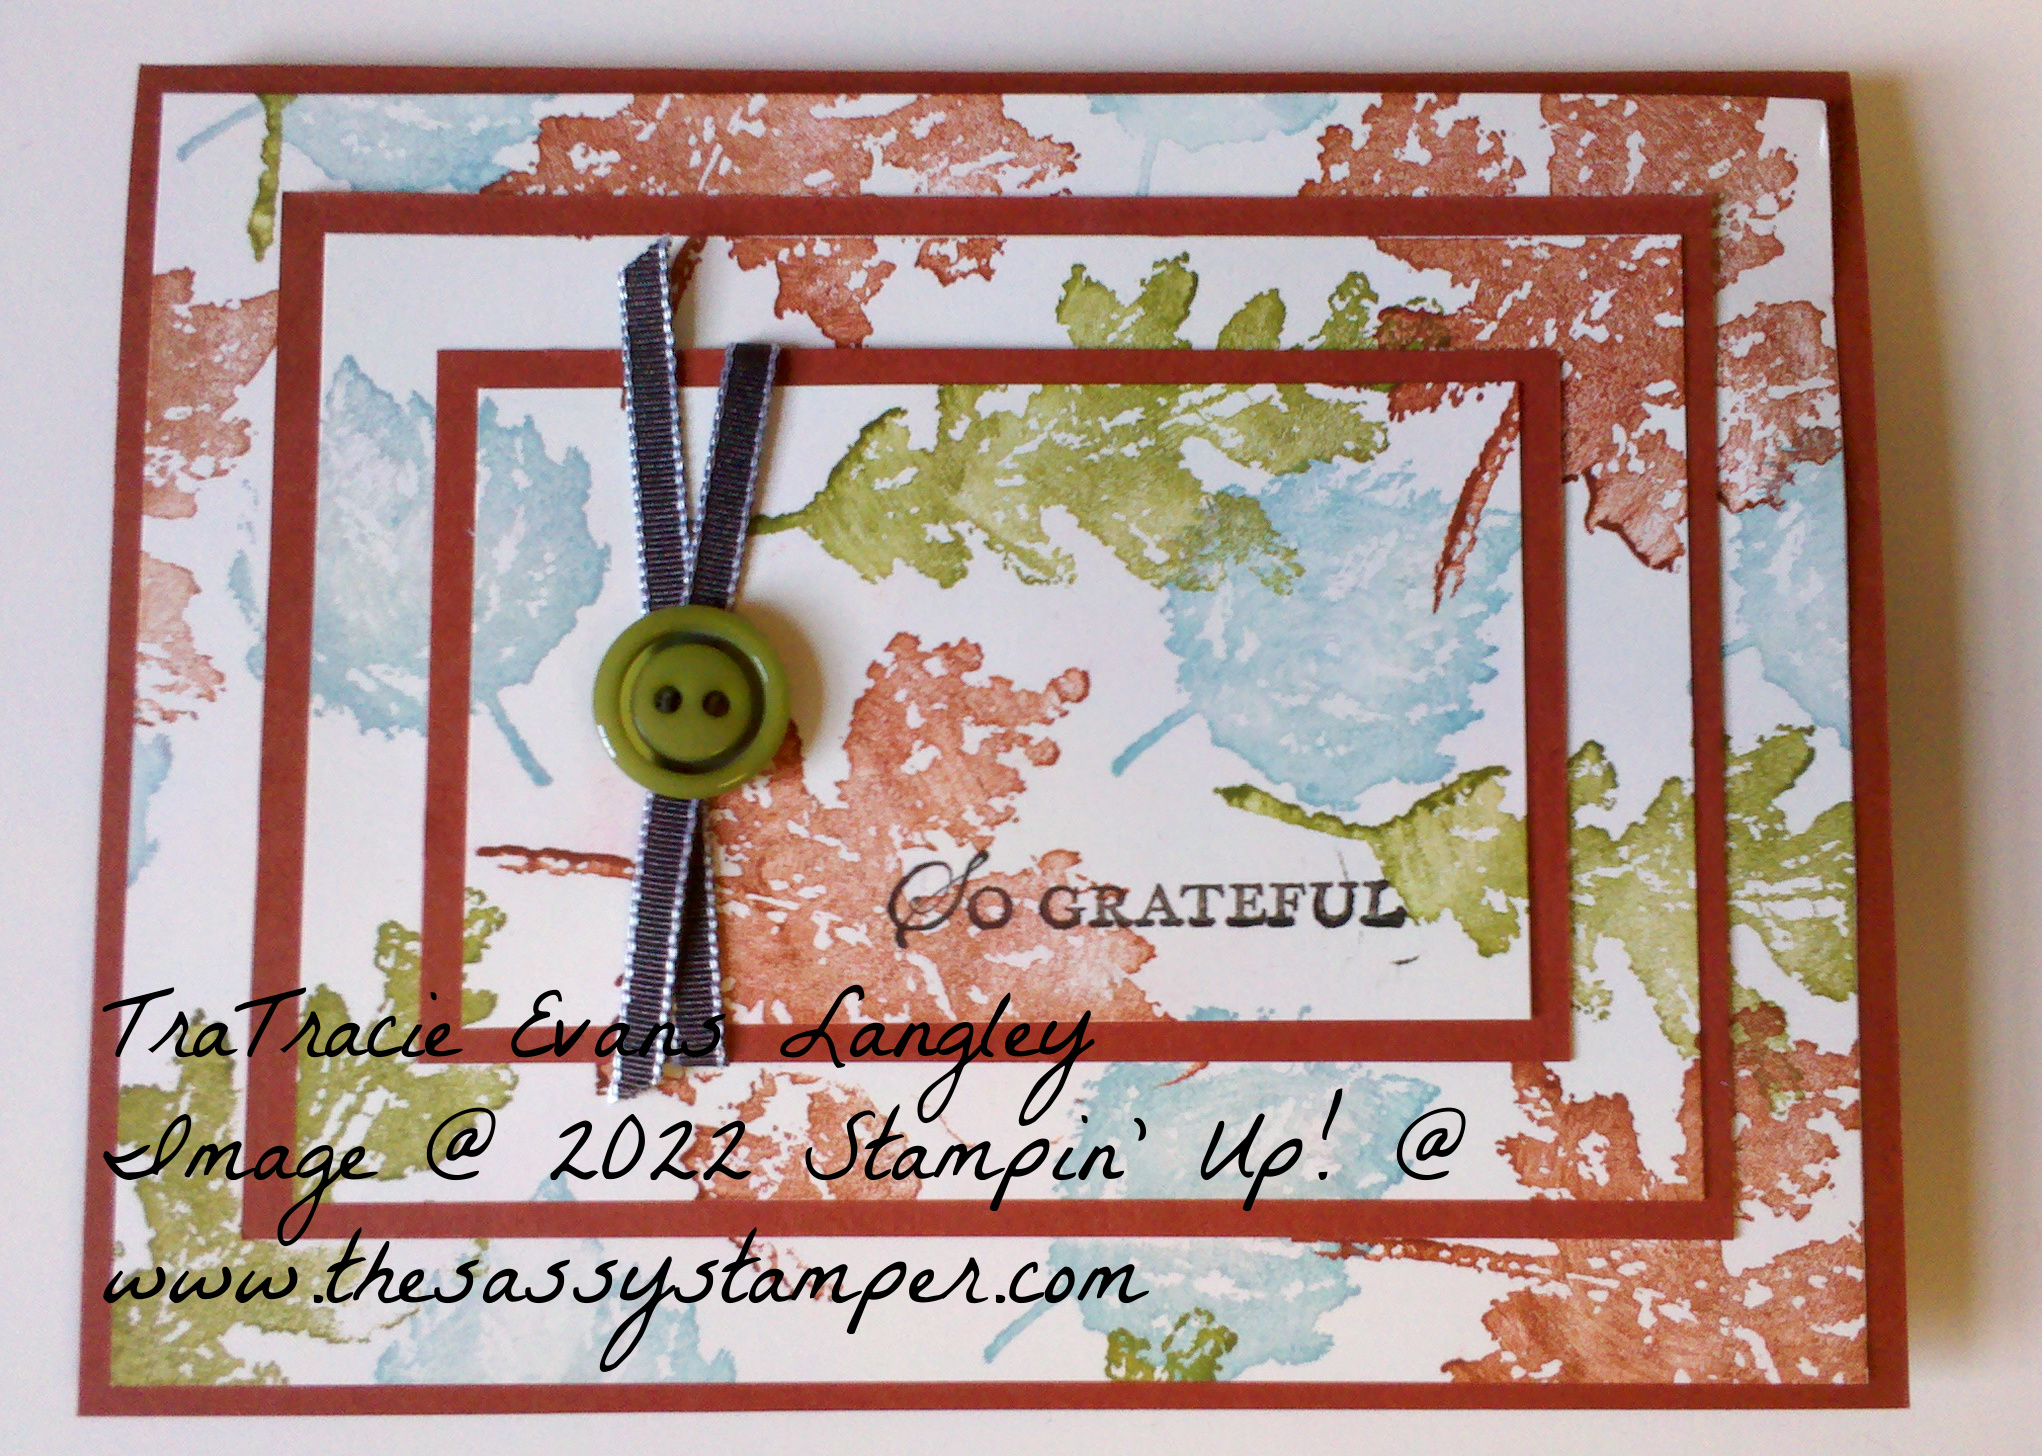
So, for my project I decided to do a case of one of my own cards from years ago that used the Triple Time Stamping Technique. If you are one of those people who has trouble with layering on your cards this is a great technique for you. It is super simple, but looks like you worked a lot harder that you did. Really, the hardest part of this technique is deciding which colors to use! That is my kind of card! Here is the card I created for my Terrific Techies many years ago using the Gently Falling stamp set.
Here are the measurements and directions for the Triple Time Stamping Technique.
- Three pieces of Whisper White or Very Vanilla cardstock 2 x 3 ¼, 3 x 4 ¼ & 4 x 5 ¼
- Three pieces of any Solid Color cardstock 2 ¼ x 3 ½ (mat), 4 ½ x 31/4 (mat), 8 ½ x 5 ½ (card base)
Choose a stamp set that is non-directional. Floral sets works great!
- Lightly attach all three layers of your choice of neutral cardstock using SNAIL Adhesive.
- Ink and stamp images over all three layers of neutral cardstock.
- Detach the three layers and adhere to their corresponding mats.
- Accessorize as desired and assemble all your layers.
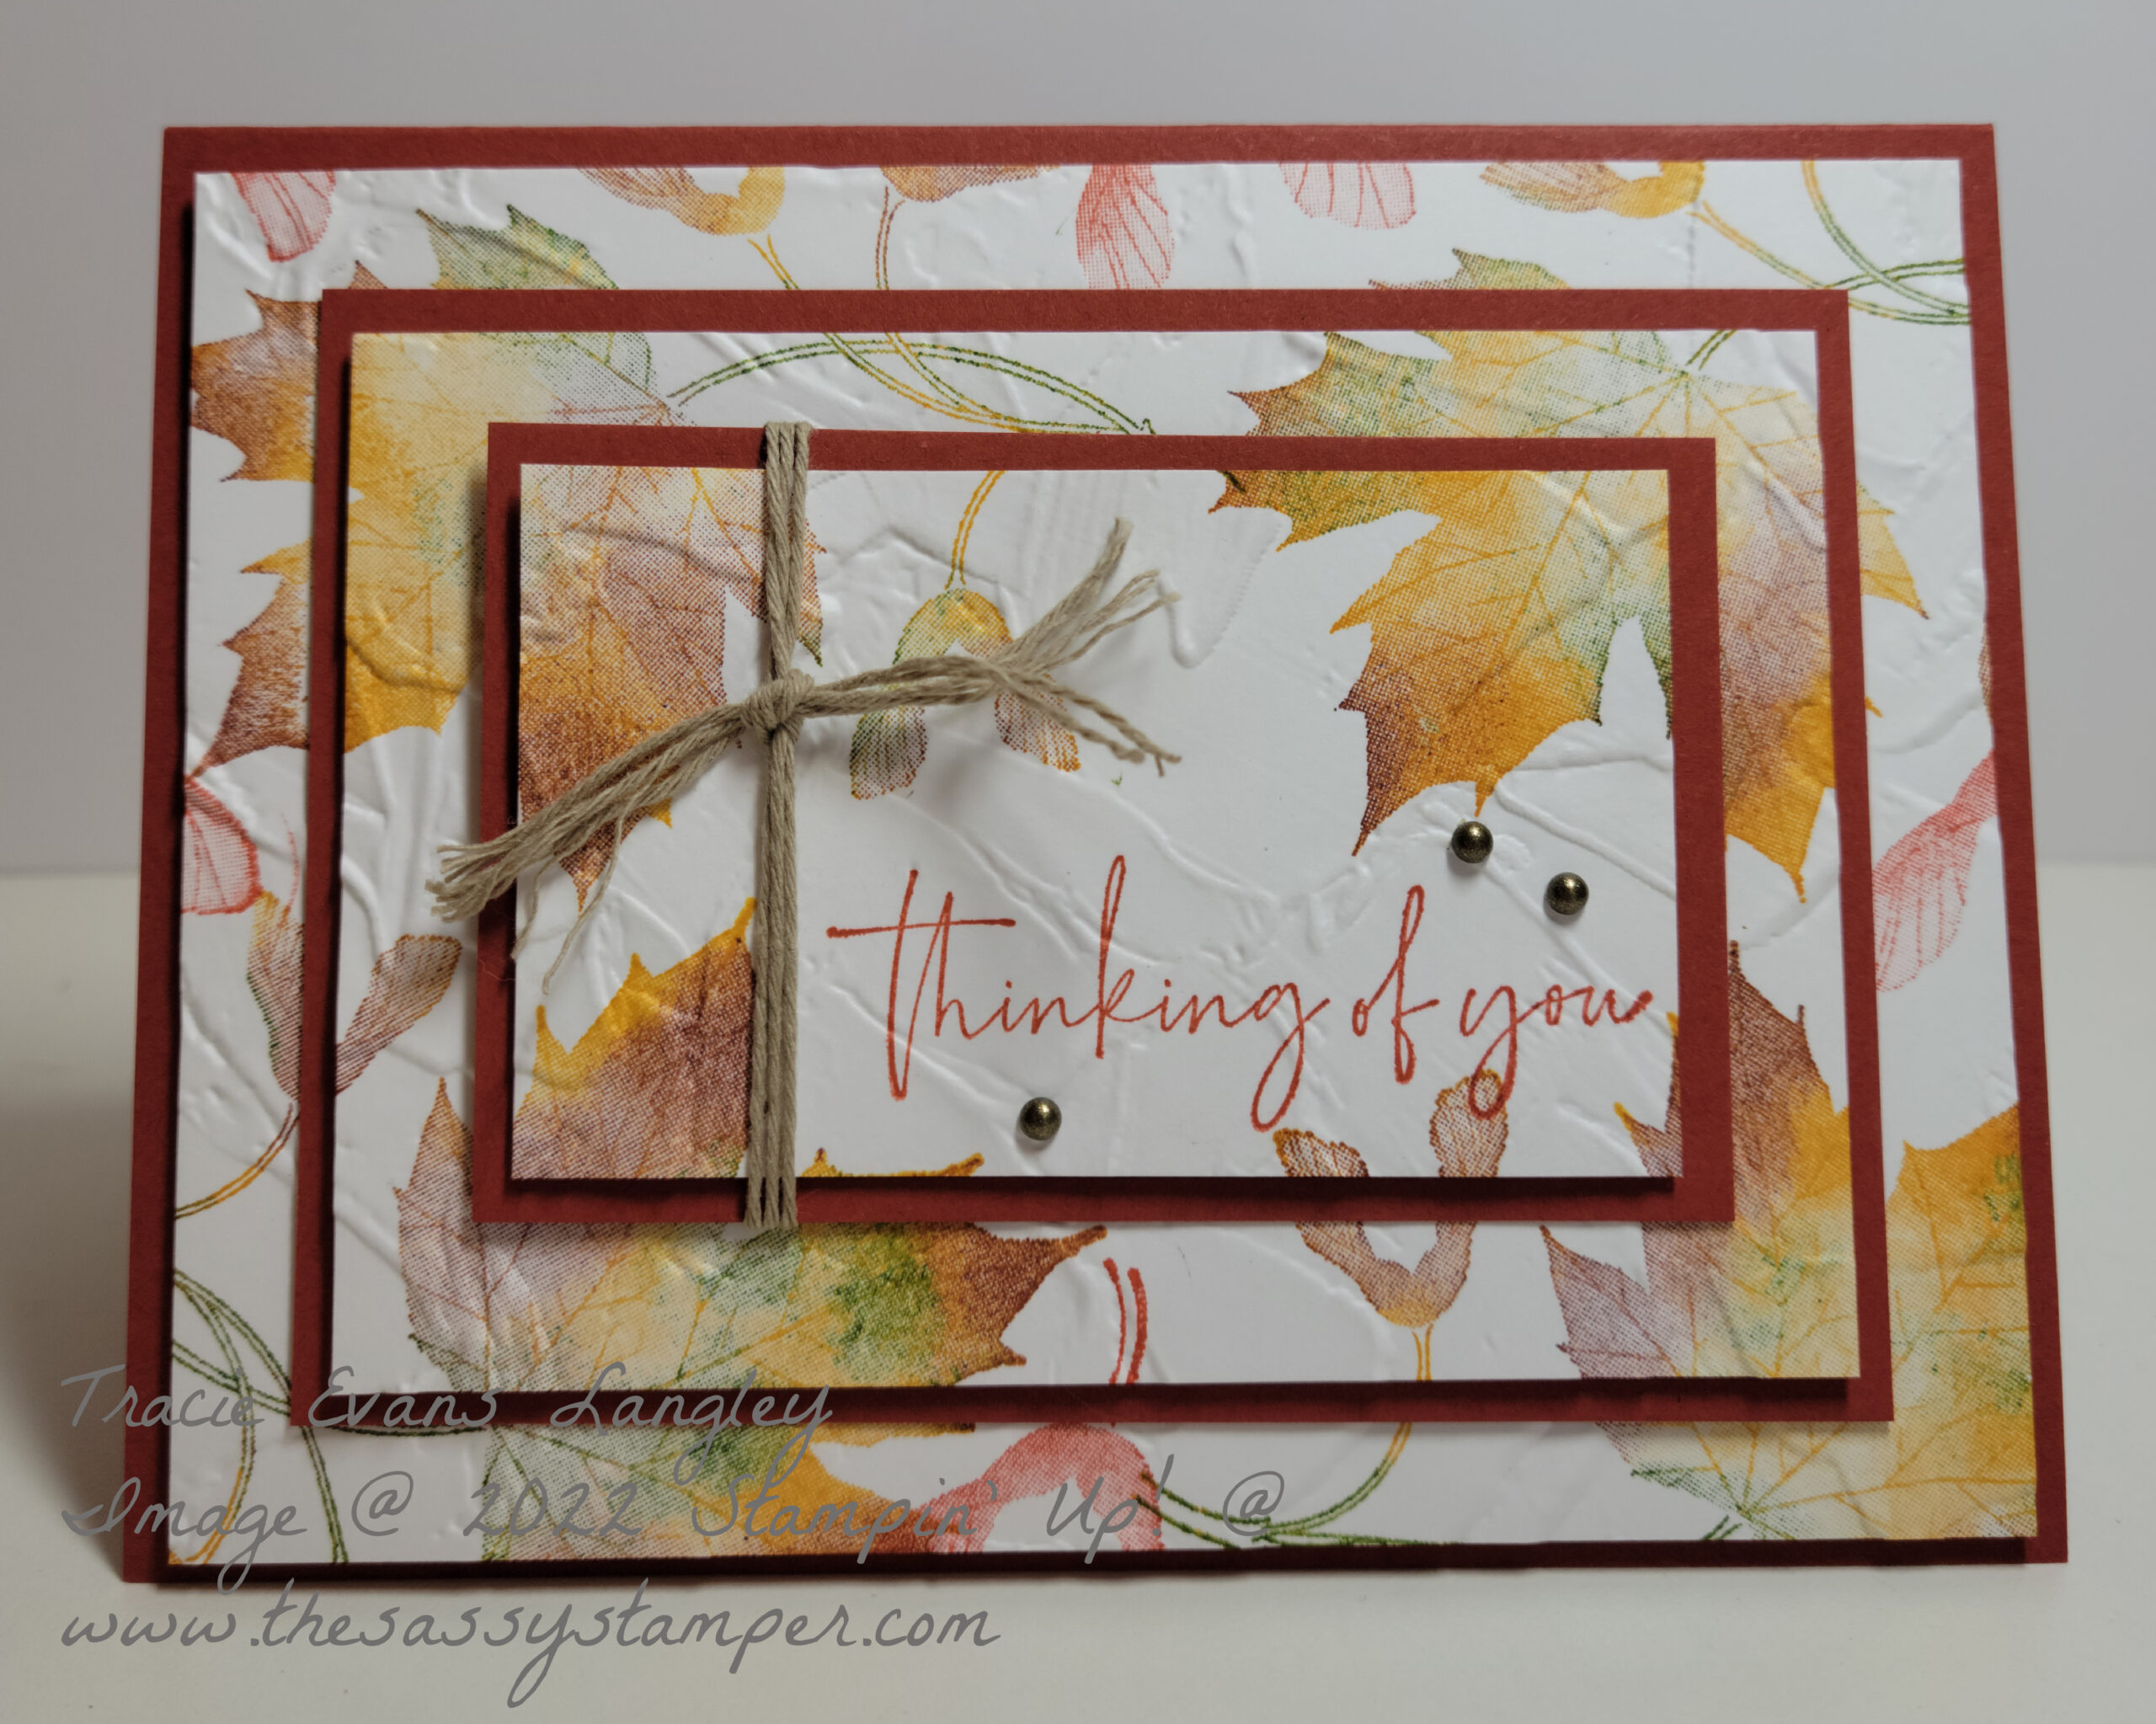
 When I created my updated card I used the new Soft Seedlings stamp set that can be found in the July to December Mini Catalog. I wanted to give the leaves a little texture and depth, so I inked them first using Crushed Curry then added Blackberry Bliss and Mossy Meadow to the stamp using a dauber. Remember to clean your stamp each time you are going to re-ink it. You don’t want Blackberry Bliss or Mossy Meadow ink on your Crushed Curry ink pad! After I finished stamping I decided to emboss all three layers of cardstock with the Painted Texture 3D Embossing Folder. I love that extra bit of texture it added, but keeps the card crisp and fresh. Just like a Fall day!
I did add a little twine and the Rustic Metallic Adhesive Backed Dots as a finishing touch. But the nice thing about this technique is that you can keep it simple and don’t have to add anything at all.
Thank you so much for letting me share my leafy project with you. I hope I have inspired you to try out this fun technique. If you have any questions, need help placing an order or need help with another project please contact me. I would love to help you!
Now I am off to check out Tina Lesson
for this month. I know it will be great!
Happy Stamping!

 September 2022 Blog Hoppers
Tina Lesson
Jo Anne Hewins
Laurie Meier
Toni Campana
Tracie Evans Langley
Product List


Thanks for the reminder on how to do this technique, Tracy! I haven’t done one in years, but now I want to 🙂
Love the card I haven’t made one like that in a long time thanks for sharing and putting ideas in my head
I love this!
Thank you, Darla! I will give you a card kit when I see you Saturday at World Card Making Day!
Tracie – LOVE your card! The colors are amazing, especially since you added multiple colors using a dauber. And, the stamp set is one of my new favorites. It is simply gorgeous. Thanks for all you do for the monthly blog hops!
Thanks so much, Laurie! I love this set, too!